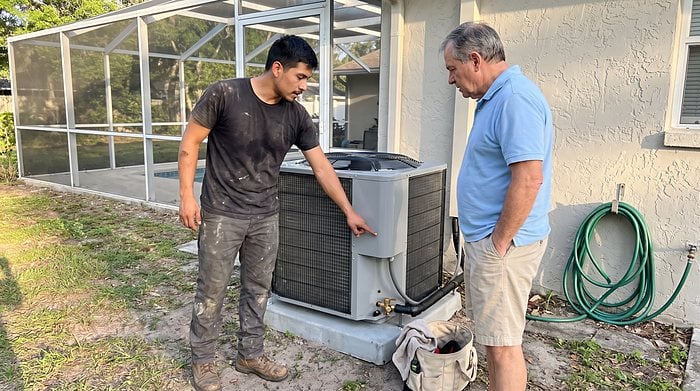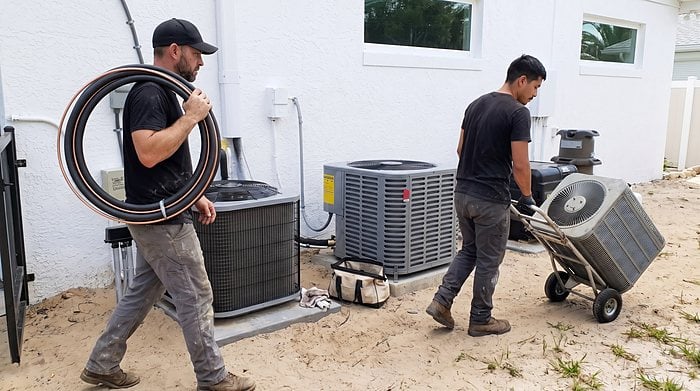
An AC installation can look deceptively simple from the outside: the old equipment comes out, the new equipment goes in, and cool air comes from the vents again. But between those steps are several important stages that determine how well the new system will perform. Knowing what happens inside your Orlando home can help you recognize a careful installation.
Most residential changeouts take roughly 4 to 8 hours, although attic access, ductwork, electrical changes, refrigerant line replacement, or unexpected conditions can extend the job. The goal should never be to finish as quickly as possible. It should be to leave you with a properly installed, tested, commissioned, and documented system that is ready for Florida's heat.
How Long Does an AC Installation Take?
Most straightforward Orlando AC replacements can be completed in roughly 4 to 8 hours. The timeline varies with equipment location, attic accessibility, line-set condition, ductwork, electrical requirements, and whether additional repairs are discovered after the old equipment is removed.
| Installation Stage | Typical Time |
|---|---|
| Home walkthrough and preparation | 20–30 minutes |
| Refrigerant recovery and equipment removal | 1–2 hours |
| Site preparation and line-set/electrical work | 1–2 hours |
| New indoor and outdoor equipment installation | 1–2 hours |
| Brazing, pressure testing, and evacuation | 1–2 hours |
| Charging, startup, and commissioning | 45–90 minutes |
| Final walkthrough and paperwork | 20–30 minutes |
These are general ranges rather than guarantees. A difficult attic, damaged ductwork, a contaminated line set, or an electrical modification can add several hours. A contractor should explain those possibilities before installation day rather than treating every home as an identical changeout.
One thing should not be sacrificed simply to make the schedule shorter: system commissioning. A crew may physically install the equipment relatively quickly, but the refrigerant circuit still needs to be pressure-tested, evacuated, charged correctly, and measured under operating conditions before the job is considered complete.
What Happens When the AC Crew Arrives?
The first part of the installation should feel more like a walkthrough than a demolition project. The lead technician should confirm the equipment being installed, review where the indoor and outdoor components will sit, discuss access, and identify anything that may affect the work before the existing system is disconnected.
Protecting the home is part of that process. An AC installation can involve moving equipment through hallways, bedrooms, garages, or attic access points, so a professional crew should establish the work path before carrying equipment through the house.
You should normally see several basic precautions:
- Floor runners or protective coverings along the work path
- Doorframe and corner protection where equipment will pass
- Confirmation that pets are secured before exterior doors remain open
- Electrical power safely disconnected before equipment is opened
- A clear explanation of where the crew will work and store materials
This first 20 to 30 minutes can tell you quite a bit about the installation. A crew that takes time to protect the property and confirm the scope is less likely to treat the rest of the job as a race against the clock.
How Is the Old AC Removed?
Before the old system is disconnected, the refrigerant must be recovered properly. Residential technicians cannot simply release refrigerant into the atmosphere. EPA Section 608 requirements govern refrigerant handling, and recovery must be performed with approved equipment and a certified recovery cylinder.
Refrigerant recovery commonly takes 30 to 60 minutes, depending on the system and site conditions. The technician connects a recovery machine, transfers the refrigerant into a designated cylinder, and verifies that the old system has been properly recovered before continuing with removal.
After recovery, the electrical connections can be disconnected and the old condenser, evaporator coil, air handler, or furnace components can be removed as applicable. This is also when hidden conditions can become visible. Once the old equipment is out of the way, the technician may discover:
- A corroded drain pan
- Damaged or poorly connected ductwork
- Water staining around the air handler
- An undersized return
- Deteriorated insulation
- An unsuitable or contaminated refrigerant line set
Not every discovery means additional work is required. The important part is that the contractor identifies the condition and explains what it means before proceeding with an unexpected charge.
How Is the Old AC Removed and the Site Prepared?
The first physical step is removing the existing equipment safely and preparing the space for the replacement. The old refrigerant must be recovered before the system is disconnected, and once the equipment is out, the technician can inspect the conditions that were hidden behind it.
Refrigerant recovery commonly takes 30 to 60 minutes, depending on the system and site conditions. The technician uses approved recovery equipment and a certified cylinder rather than releasing refrigerant into the atmosphere, as required under EPA Section 608.
After recovery, the crew disconnects the electrical and removes the existing condenser, evaporator coil, air handler, or furnace components as applicable. This is often when previously hidden installation issues become visible.
An HVAC technician may find:
- Corroded drain pans or water damage
- Damaged or poorly connected ductwork
- Deteriorated insulation around the equipment
- An undersized or restrictive return
- Contaminated or unsuitable refrigerant lines
- Drainage or platform problems around the indoor unit
After the old equipment is removed, the installation area is prepared for the replacement. The technician checks the condenser pad, indoor equipment platform, drain routing, electrical connections, duct transitions, service clearances, and refrigerant line set before permanently connecting the new equipment.
The existing copper line set should also be evaluated rather than automatically reused. Its size, condition, cleanliness, and compatibility with the new equipment all matter. If the previous compressor experienced a burnout, contamination inside the refrigerant circuit may make cleaning or replacing the line set necessary.
Why Is Nitrogen Used During AC Installation?
Brazing connects the copper refrigerant lines, but the quality of those joints depends on how the work is performed. Heating copper while oxygen is present inside the tubing can create oxidation that may later travel through the refrigerant circuit and interfere with components.
To reduce that risk, technicians can flow dry nitrogen through the refrigerant lines while brazing. After the joints are completed, the system is pressure-tested with dry nitrogen to verify that the connections are holding before the system is evacuated and charged.
| Step | What It Checks |
|---|---|
| Nitrogen flow during brazing | Helps limit copper-oxide formation inside the tubing |
| Nitrogen pressure test | Checks the sealed refrigerant circuit for leaks |
| Joint inspection | Confirms brazed connections are properly sealed |
| Leak correction | Allows problems to be fixed before refrigerant is added |
The exact pressure used for testing depends on the equipment manufacturer's requirements, so there is no single pressure that applies to every installation. What matters is that the system is tested appropriately and any loss of pressure is investigated before the installation moves forward.
How Is the New AC Tested Before You Get the House Back?
Once the system has been pressure-tested and evacuated, the technician can introduce refrigerant according to the manufacturer's requirements and start the equipment. This is where installation becomes commissioning.
The technician should not simply turn the thermostat down and wait for cold air. Several operating measurements help establish whether the system is actually performing as intended.
Temperature Split Is Checked
The technician measures return-air and supply-air temperatures to determine the system's temperature difference under the current operating conditions. An unexpected result can point toward airflow, refrigerant charge, ductwork, or equipment issues.
Refrigerant Charge Is Verified
Depending on the system and metering device, the technician may evaluate superheat and subcooling alongside other manufacturer-required measurements. Refrigerant should be charged according to the equipment specifications, not by guesswork.
Airflow and Static Pressure Are Measured
Total external static pressure helps show whether the duct system is restricting airflow. A new AC can have the correct equipment capacity and still perform poorly if the distribution system cannot move the required amount of air.
Safety Controls Are Tested
Float switches, pressure controls, disconnects, and other applicable safety components should be checked. The thermostat should also be configured correctly for the equipment that was actually installed.
These measurements are more meaningful than hearing, "It's blowing cold." A system can produce cold air and still have an incorrect charge, restricted airflow, excessive static pressure, or a drainage problem.
What Should You Receive Before the Crew Leaves?
The installation is not finished simply because the thermostat is cooling the house. Before the crew leaves, the homeowner should receive enough information to understand what was installed and what was measured. At minimum, the final paperwork should identify the new equipment and document important installation information.
Look for:
- Indoor and outdoor model numbers
- Equipment serial numbers
- Relevant commissioning measurements
- Refrigerant charging method
- Superheat or subcooling measurements where applicable
- Static-pressure or airflow information where measured
- Warranty information and registration details
- Permit information
- Filter size and location
- Thermostat operation and basic system instructions
The permit is particularly important. For an Orlando-area replacement, homeowners should confirm what permitting and inspection requirements apply to their specific property and installation. If a permit is required, ask for the permit number and understand how the inspection will be handled.
You should also receive a basic walkthrough before the crew leaves. The technician should show you the thermostat, filter location, electrical disconnect if appropriate, condensate safety components, and anything you will need to maintain between service visits.
What Are the Biggest AC Installation Red Flags?
A homeowner does not need to stand beside the crew all day to judge an AC installation. The better approach is to look for whether the important steps are being addressed, explained, and verified. A rushed installation often skips the less visible work that affects refrigerant performance, airflow, drainage, electrical safety, and long-term reliability.
The Installer Does Not Verify the Existing System
A replacement should not begin with simply removing the old equipment. The contractor should confirm equipment specifications, electrical requirements, refrigerant-line compatibility, drainage, duct connections, and available installation space before the new system is connected.
The Refrigerant Circuit Is Not Properly Tested
New refrigerant connections should be checked for leaks before the system is charged. If the installer moves directly from brazing to adding refrigerant without an appropriate pressure test, there is no meaningful opportunity to catch a leak before the system starts operating.
The Vacuum Is Never Properly Verified
Pulling a vacuum is not the same as proving that the system has been properly evacuated. A micron gauge provides an actual measurement of the vacuum level and helps confirm that the refrigerant circuit is ready for charging and startup.
Existing Problems Are Simply Covered Up
Installation day can reveal damaged ductwork, poor drainage, deteriorated insulation, electrical issues, or an unsuitable line set. A responsible contractor should explain these conditions and discuss the available solution rather than quietly connecting new equipment to a known problem.
The System Is Started Without Meaningful Measurements
Cold air coming from the vents does not prove that an installation is complete. The technician should verify relevant operating conditions and confirm that the equipment is functioning according to the manufacturer's requirements before considering the job finished.
You Are Given No Clear Completion Information
A professional installation should leave you knowing what equipment was installed, what warranty applies, and whether any important recommendations remain. The homeowner should not have to guess what was changed or whether the system was actually tested.
The right contractor handles the entire installation process, not just the equipment swap. Before choosing an HVAC company, ask how they handle refrigerant recovery, line-set evaluation, brazing, pressure testing, evacuation, electrical connections, startup, and commissioning. A contractor who can clearly explain those steps is better positioned to manage the unexpected conditions that can arise once the old system is removed.
Why Choose Jormechanical Air for AC Installation in Orlando?
An AC replacement is a major home project, but homeowners should not have to understand refrigeration engineering to know whether the work is being done properly. The useful standard is straightforward: protect the home, recover refrigerant correctly, install the equipment according to specifications, test the refrigerant circuit, verify operation, and document the results.
On a Jormechanical Air install, tarps go down before any equipment comes inside, and you're welcome to watch every step, from refrigerant recovery to the startup check. We count the job done only once it passes inspection, and every install carries one year of labor coverage.
If you are planning a professional AC installation, ask before installation day how the refrigerant circuit will be pressure-tested, how evacuation will be verified, whether nitrogen will be used during brazing, what permitting applies, and which commissioning measurements you will receive.
A good installation should leave you with more than a new condenser and air handler. It should leave you with a properly tested system, clear documentation, and confidence that the work behind the panels was done as carefully as the parts you can see.